Genie says a flashing red Safe-T-Beam LED indicates a malfunction. Check for dirty lenses, obstructions, loose wiring and sensor alignment. The sensors should face each other near the bottom of the opening.
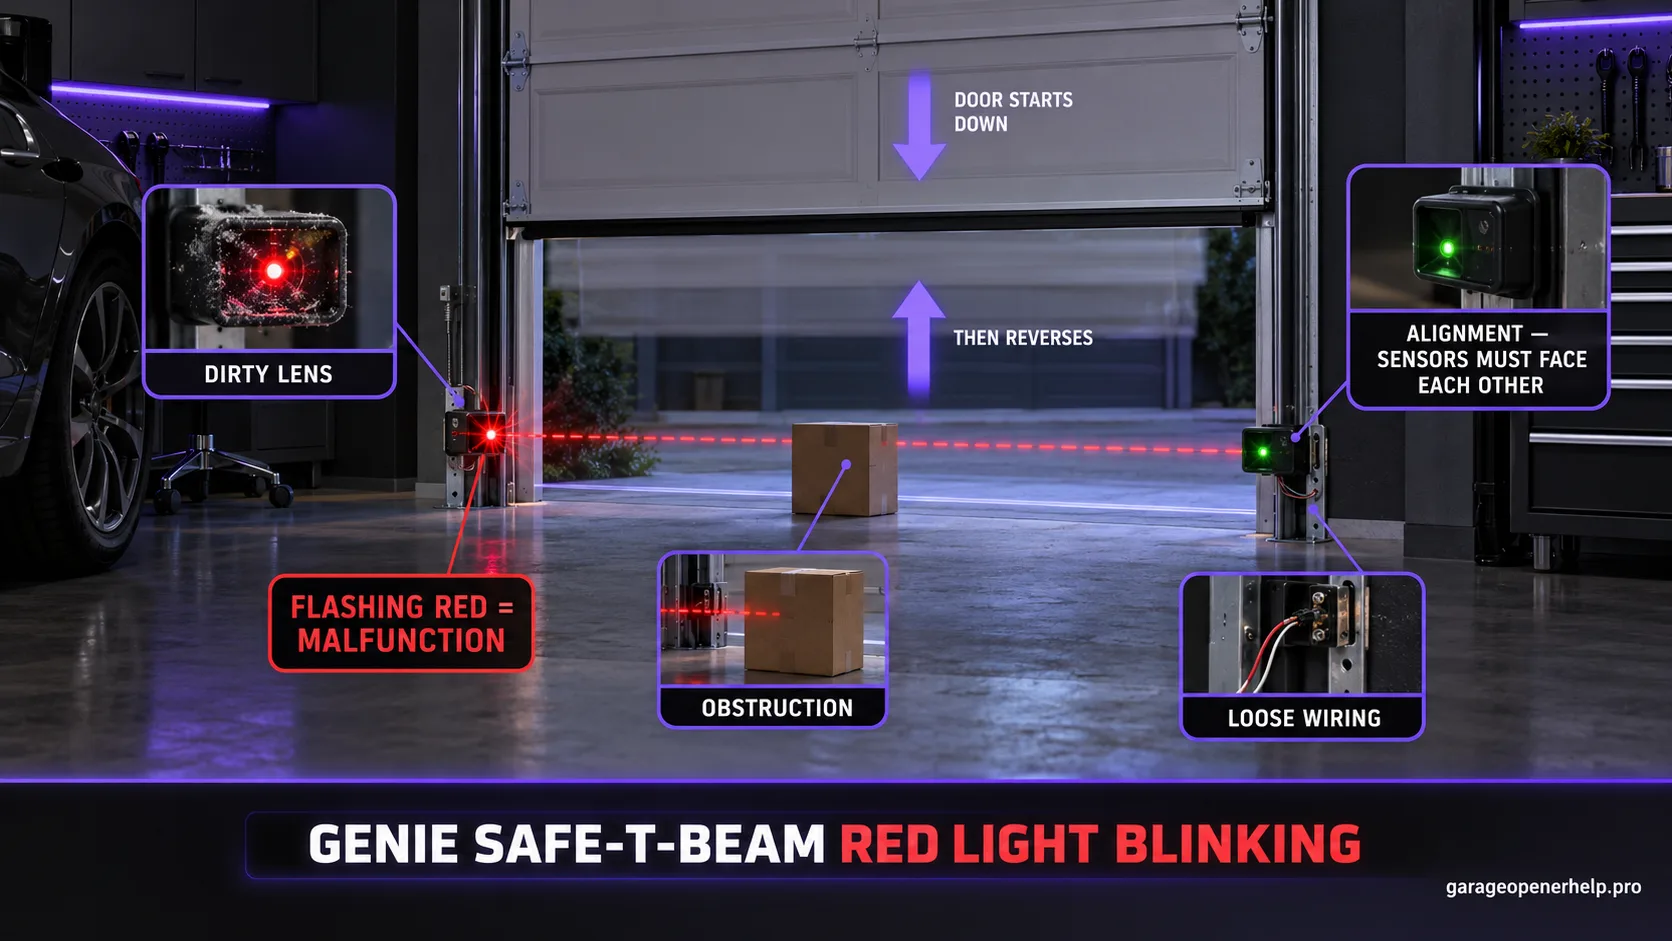
Read Genie Safe-T-Beam red and green LEDs together
What is each Safe-T-Beam eye reporting at the same time?
Record both LED states before choosing a blink-code branch.
Genie identifies the red LED unit as the source/transmitter and the green LED unit as the receiver. A blink count is not enough by itself: several diagnostic branches change depending on whether the other LED is steady, off or also abnormal.
What you are likely to notice
- Red Safe-T-Beam LED flashes
- Door starts down then reverses
- Door may refuse to close normally
Check these in order
1. Clean both lenses
Dust, water spots and spider webs can interrupt the beam. Clean gently and keep the doorway clear.
2. Confirm sensor height and aim
Genie specifies the beam near the floor; the source and receiver need a clear line of sight and should face each other.
3. Inspect sensor wiring
Look for pinched, broken or loose low-voltage wires and loose terminal connections.
4. Count the blink pattern
A repeating number of blinks can narrow the fault. Use the Safe-T-Beam diagnostic chart rather than treating every flashing red LED as the same problem.
A blinking red LED is the start of the diagnosis, not the diagnosis itself
Genie identifies a flashing red Safe-T-Beam LED as a malfunction, but the follow-up is to read the repeating blink pattern and the companion green LED. A generic “replace the sensor” answer throws away useful information. Clean the lenses and remove obvious obstruction, then watch the exact pattern long enough to count it reliably.
Genie specifies that the Safe-T-Beam units sit near the floor and face each other across the opening. A bracket knocked slightly out of line by a trash can, bike or stored item can produce an intermittent problem even when the sensor looks roughly aimed.
Wiring matters even when the sensor still lights
Low-voltage sensor wiring can be pinched, broken or loose. A wire may make intermittent contact as the garage warms, cools or vibrates. Inspect accessible wire and terminals rather than assuming an illuminated LED proves the entire circuit is healthy.
Once the LEDs return to the normal state, test the protective reversal behavior as Genie instructs. If the beam is interrupted during a closing cycle, the door should respond correctly. A stable light without a correct reversal test is not the end of the check.
Count the repeating red pattern before moving the sensors
A blinking red Safe-T-Beam LED is not a single diagnosis. Genie publishes different meanings for two, three and four red blinks, and the green LED state is part of the interpretation for the two-blink branch. Watch long enough to identify the full repeat pattern and the pause. If you move the sensors first, you can erase the most useful evidence before you know whether the original problem was alignment, interference, wiring or a source-side fault.
Use the pattern to choose the next low-risk check: two blinks can lead to alignment/obstruction or wiring depending on green status; three blinks with green on points toward interference; four blinks with green on points toward the source not sending pulses/source failure. If the pattern is inconsistent or does not match the official table for your system, use the opener model and manual instead of forcing it into the closest count.
- Count blinks through at least two complete repeat cycles.
- Record the green LED state at the same time.
- Do not call every red blink an alignment problem; 3- and 4-blink patterns have different branches.
A good diagnostic record includes the exact blink count, the length of the pause, the green LED state and whether the pattern repeats consistently. If possible, capture two full cycles before changing anything. That record is especially valuable because a two-blink alignment branch, a three-blink interference branch and a four-blink source-pulse branch call for different next steps.
Stop DIY troubleshooting when…
- A sensor bracket cannot hold alignment
- Wiring damage continues into an inaccessible area
- The door has a separate mechanical problem
Garage door springs, cables and a falling/unbalanced door can store or release dangerous force. Those are door-system problems, not just opener settings.
Common questions
What does a flashing red Genie Safe-T-Beam light mean?
Genie says it indicates a malfunction. Count the repeating pattern and check the green LED to narrow the cause.
Can sunlight make a Genie sensor act up?
Interference is one branch in Genie’s diagnostic chart. If the problem changes with lighting conditions, record that pattern while also checking alignment and wiring.
How high should the sensors be?
Genie’s support material places the beam near the bottom of the door opening. Follow the exact installation instructions for the sensor set rather than moving it arbitrarily.
Manufacturer sources used
These links are the factual baseline for the diagnostic claims above. Model-specific manuals can supersede general guidance.