LiftMaster/Chamberlain error code 1-3 means the opener has detected a short in the low-voltage wires between the wall control and the garage door opener. A classic clue is that remotes and the keypad still operate the opener while the wall control does not. Inspect exposed red/white control-wire connections and the accessible wire run before replacing the wall control or logic board.
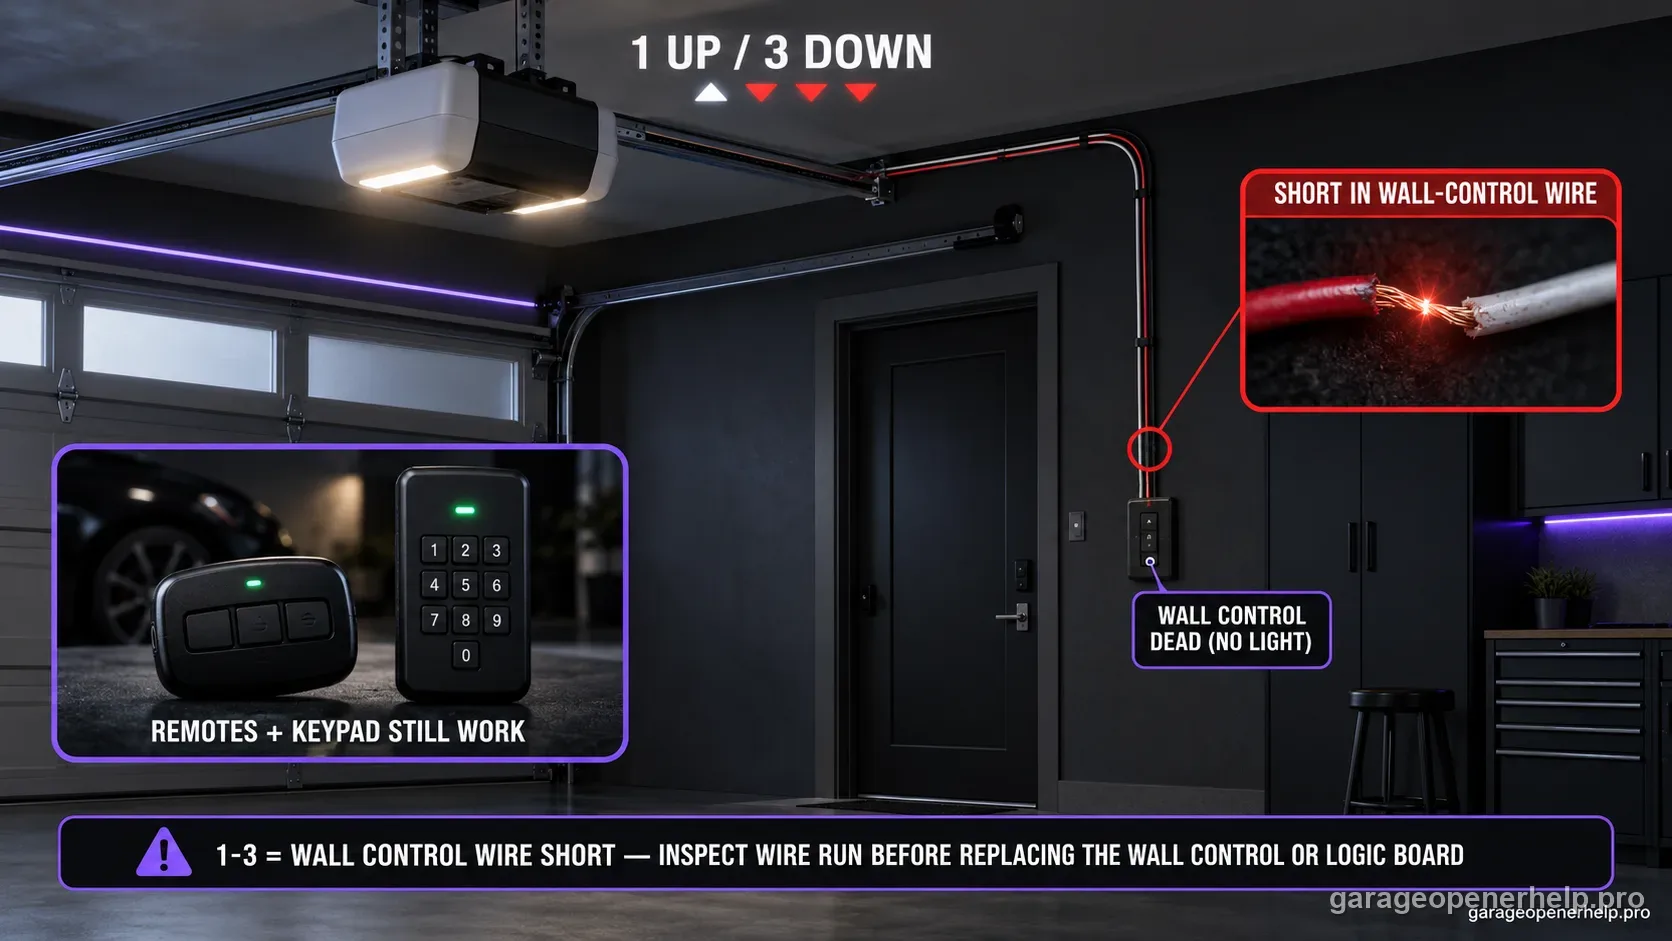
Diagnostic snapshot
- Answer
- LiftMaster/Chamberlain 1-3 means the low-voltage wall-control circuit is shorted for more than the documented threshold; remotes/keypad can still work while the wall control does not.
- Check first
- Confirm a known remote or keypad still operates the opener, then inspect accessible red/white wall-control wiring and exposed conductors at both ends.
- Strong clue
- Wireless controls working normally while the wall panel is dead sharply narrows the problem toward the door-control wire/panel path rather than the radio receiver.
- Model / generation note
- This diagnostic belongs to supported Security+ 2.0 units that report UP/DOWN arrow codes; use exact model wiring instructions before testing conductors.
Read an UP / DOWN diagnostic code in the correct order
Which arrow flashes first, and how many times?
Security+ 2.0 openers with UP and DOWN adjustment arrows report a code as UP-arrow flashes followed by DOWN-arrow flashes, then pause and repeat. A 4-1 therefore means four UP flashes followed by one DOWN flash; the code does not mean '41 flashes'.
This exact manufacturer signal can feed the following diagnostic family. Keep the original code or LED pattern when troubleshooting.
What you are likely to notice
- The opener reports 1 UP flash followed by 3 DOWN flashes on a Security+ 2.0 unit.
- Handheld remotes and the wireless keypad may still operate the opener.
- The wall control panel does not operate the door and may have no LED/backlight.
- The problem may appear after a wall-control replacement, staple/nail work, painting, remodeling, or disturbed low-voltage wiring.
Check these in order
1. Prove the problem is isolated to the wall-control path
Test one known programmed remote or keypad. If wireless controls work but the wall panel does not, that matches Chamberlain Group's documented 1-3 symptom and makes a whole-opener power failure less consistent.
2. Inspect the red/white low-voltage connections
With the opener safely powered down as required by the manual, look for excessive bare copper, loose conductors, or two wires touching at the opener terminals and at the screws on the back of the wall control. Do not work on mains-voltage wiring.
3. Follow the accessible control-wire run
Look for a staple, screw, nail, crushed jacket, or damaged section where the two low-voltage conductors could be shorted together. Chamberlain Group specifically lists shorted control wire as the reason this code appears.
4. Separate wire failure from panel failure
Chamberlain Group's detailed diagnostic table uses a short length of temporary test wire to distinguish the installed wire run from a shorted door-control circuit. If that low-voltage test is outside your comfort level, stop before replacing parts and use dealer support.
Why 1-3 is almost the mirror image of a remote-only problem
A useful way to diagnose 1-3 is to compare control paths. Chamberlain Group describes a situation where the remote controls and keypad still operate the opener but the wall control does not. That is valuable because it proves the motor, basic opener power, and at least one command path can still work. The evidence pushes the investigation toward the wall-control circuit rather than the radio receiver.
Do not confuse that pattern with the common 'wall button works, remote does not' problem. That opposite symptom belongs in a remote battery/programming/radio branch. Keeping those two patterns separate is one of the easiest ways to avoid buying the wrong control or clearing remote memory for no reason.
The short can be at either end—or in the wall
The detailed Chamberlain diagnostic table lists exposed/shorted wire at the opener's red/white terminals, exposed wire at the screws on the back of the door control, and a staple/screw/nail that shorts the cable along the run. A wall panel can also have an internal short. The visible inspection therefore should cover the full accessible control path instead of staring only at the panel.
Take a close photo before moving conductors. Too much stripped copper can let neighboring wires touch; too little can create an unreliable connection. If the wire disappears behind finished drywall and the problem cannot be located safely, a temporary short-wire test described by Chamberlain can separate the installed cable from the wall control—but only perform it if you are comfortable with the manufacturer's low-voltage procedure.
What not to replace from code 1-3 alone
Code 1-3 does not by itself prove that the logic board is bad. It also does not prove the wall control itself is bad. The manufacturer intentionally gives a test sequence because a shorted wire and a shorted panel can produce the same failed-wall-control symptom.
Likewise, a new handheld remote will not repair a wall-control wire short when existing remotes already operate the opener. The strongest next purchase decision is usually no purchase at all until the installed low-voltage path and the wall panel have been separated diagnostically.
Stop DIY troubleshooting when…
- The control cable disappears into a wall and visible inspection cannot locate the short
- The opener terminal block or wall control shows heat/burn damage
- You cannot safely distinguish low-voltage control wiring from mains wiring
- The code remains after verified control wiring/panel diagnosis
Garage door springs, cables and a falling/unbalanced door can store or release dangerous force. Those are door-system problems, not just opener settings.
Common questions
Can LiftMaster code 1-3 appear while remotes still work?
Yes. Chamberlain Group lists working remotes/keypad with a non-working wall control as the characteristic behavior for 1-3.
Does 1-3 mean the wall control itself is definitely bad?
No. The short can be at the opener terminals, wall-control terminals, installed wire run, or the control panel circuit.
Is 1-3 a safety-sensor code?
No. Code 1-3 is for the wall-control wiring circuit; safety-sensor wiring uses other diagnostic codes such as 1-1 and 1-2.
Manufacturer sources used
These links are the factual baseline for the diagnostic claims above. Model-specific manuals can supersede general guidance.