If the door closes only while you continuously hold the wall control, treat that as a safety-system warning rather than a normal operating mode. Check the photo eyes, their alignment and low-voltage wiring before using the opener normally again.
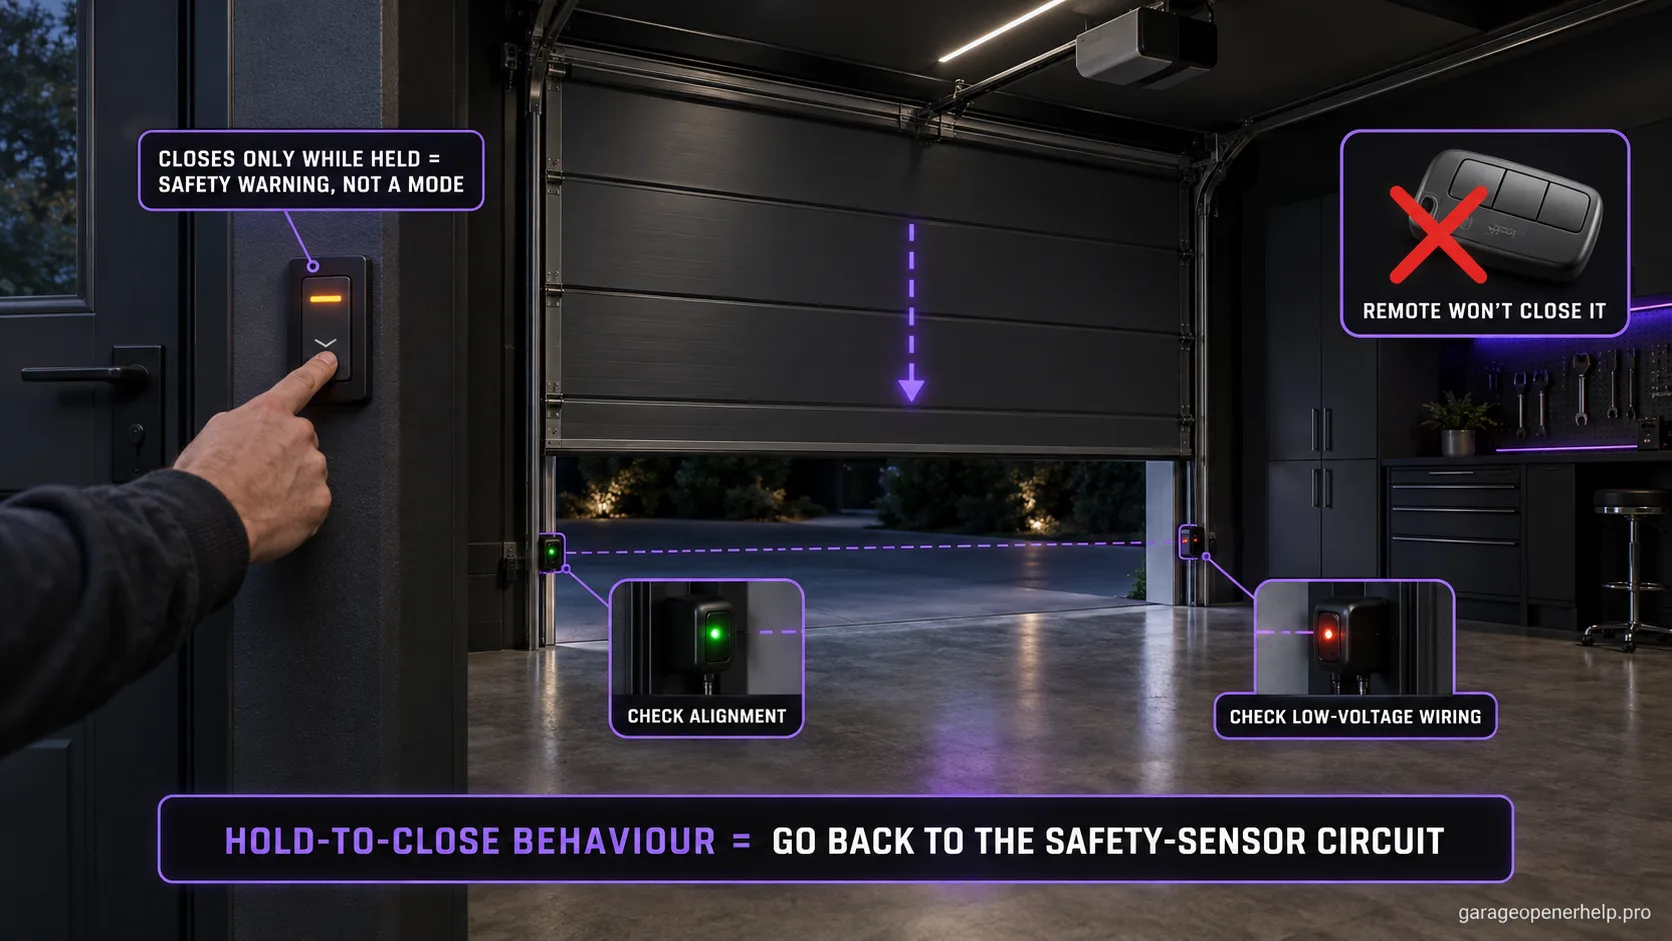
Diagnostic snapshot
- Answer
- A door that closes only while the wall control is continuously held should be treated as a safety-system warning, not as a normal operating mode.
- Check first
- Inspect the safety-sensor beam, lens condition, LED state, and visible low-voltage wiring before making travel or force changes.
- Strong clue
- Remote closing fails while hold-to-close behavior still moves the door on some systems; that pattern is much more useful than repeatedly reprogramming the remote.
- Model / generation note
- Exact override behavior varies by opener generation, so use the symptom to diagnose the sensor system rather than assuming every model behaves identically.
Read the two safety-sensor LEDs as a pair
Is the sender powered, and is the receiver seeing the beam?
Steady + steady = aligned baseline
On current Chamberlain Group safety-sensor guidance, amber identifies the sending sensor and green identifies the receiving sensor. Both LEDs steady is the normal aligned baseline; an off or blinking green receiver moves diagnosis toward alignment, obstruction or receiving-side wiring depending on the exact state.
What you are likely to notice
- Remote will not close the door
- A continuous hold on the wall control can move the door down on some systems
- Sensor lights look misaligned, off or intermittent
Check these in order
1. Treat the continuous-hold behavior as diagnostic, not a fix
On affected systems, continuously holding the wall control can allow closing when the safety-sensor circuit is not satisfied. Keep the door in full view and the doorway completely clear during any diagnostic test, and do not use this as the normal way to operate the door.
2. Clean and align the photo eyes
Make sure both lenses are clean, facing each other and not being hit by direct objects or shifted brackets.
3. Check LED stability with the door stationary
With the door stopped and the doorway clear, watch the receiving LED while making only the small alignment adjustment allowed by the sensor bracket. A flickering LED can point to alignment or a loose connection. Do not adjust sensors while the door is moving, and do not loosen track or high-tension door hardware.
4. Check the wire path
Inspect visible sensor wire for cuts, pinches, staples and loose connections at the opener terminals.
Why the wall-control behavior is such a strong clue
When the opener raises the door normally but remote closing fails and a continuous press on the wall control changes the behavior, the symptom is telling you something about the safety path used during unattended closing. It is more useful than the vague statement that the opener is “broken.” Start at the photo eyes and their wiring before touching force settings.
The most common visual clues are a blocked beam, a receiving LED that flickers with small bracket movement, a shifted sensor after something hit the track, or a low-voltage wire that has been pinched or pulled loose. Sunlight, storage items and cobwebs can create intermittent cases that seem to fix themselves at a different time of day.
What not to change first
Do not increase closing force to compensate for a safety-sensor problem. Force and travel settings solve a different class of symptoms. Also avoid twisting sensor brackets aggressively or moving track hardware just to make an LED come on; the goal is to restore the beam while leaving the door hardware correctly positioned.
If the sensors appear normal but the symptom remains, write down the opener model, wall-control model, LED states and any diagnostic flashes. That turns the next step into a model-specific support question instead of a parts lottery.
Separate a sensor override from other closing failures
First check whether an ordinary press of the wired wall control closes the door. If it does, but a remote will not, the wall-button hold-to-close symptom is not present; check lock mode, the remote battery and programming instead. The sensor branch fits when a normal close command is refused but continuous pressure on the wired wall control lets the door close while you watch it.
If the door stops partway or reverses even while the wall control is held, the override is not clearing that condition. Look for a visible obstruction and stop if the door binds or feels heavy; use the exact model’s travel/force path rather than assuming the sensors explain every refusal. If ordinary wall closing works and only an app, schedule or timer close fails, use the unattended-close or accessory-light requirements for that opener model.
Holding the wall button is a temporary close behavior, not the repair
Chamberlain's safety-sensor guidance notes that, while diagnosing a sensor problem, some openers can be made to complete down travel by pressing and holding the door-control push bar. That behavior is useful evidence because it keeps the safety-reversing circuit high on the list; it should not be treated as a permanent bypass or as proof that the sensors are healthy.
Read both sensor LEDs before changing anything. If the sending side is steady and the receiving side is off or flickering, stay with obstruction, alignment and receiving-eye wiring. If both LEDs are off, switch to the installation/power/wiring branch. Once the sensor state is restored, verify normal remote closing and run the manufacturer's safety-reversal test rather than continuing to hold the wall button for everyday operation.
- Hold-to-close behavior is diagnostic evidence, not an acceptable permanent operating mode.
- Use the LED pair to choose between alignment/receiving-eye and no-power/wiring branches.
- After repair, confirm normal remote close plus the manufacturer safety-reversal test.
Record whether normal remote close fails while hold-to-close from the wall control succeeds, plus both sensor LED states and any ten-flash or UP/DOWN code. That combination shows whether the temporary override behavior is masking an unresolved safety-sensor condition and prevents a service handoff from sounding like a generic wall-button problem.
Stop DIY troubleshooting when…
- The safety sensors cannot be made stable
- The door binds or moves unevenly
- Any high-tension door hardware is damaged
Garage door springs, cables and a falling/unbalanced door can store or release dangerous force. Those are door-system problems, not just opener settings.
Common questions
Can I keep using the wall button by holding it down?
Do not treat that as the permanent fix. The behavior is a diagnostic clue that the safety-sensor branch needs attention.
Could a bad remote cause this?
A bad remote can prevent remote operation, but if multiple remote closing methods fail while a continuous wall-button hold works, inspect the safety-sensor circuit first.
Do I need to replace both sensors?
Not automatically. Obstruction, alignment, wiring and connections should be checked before replacing sensor hardware.
What if the door still stops while I hold the wall button?
The hold-to-close override does not bypass every fault. A door that stops partway or reverses while you keep holding can have an obstruction, binding, travel or force problem; do not increase force to make it move.
What if the door closes from the wall control normally but not from a remote?
That is a different symptom from needing continuous pressure. Check lock mode, the remote battery and pairing before moving to the safety-sensor branch.
Why does an app or timer refuse to close the door when the wall button works?
Unattended close features can require a healthy safety-sensor circuit and, on some exact models, a compatible paired light or other model-specific condition. Check that opener’s manual rather than applying the wall-button override diagnosis.
Manufacturer sources used
These links are the factual baseline for the diagnostic claims above. Model-specific manuals can supersede general guidance.